
Service Request for Someone Else
The web portal allows municipal staff to submit a service request on behalf of someone else.
The flow diagram below provides an overview.
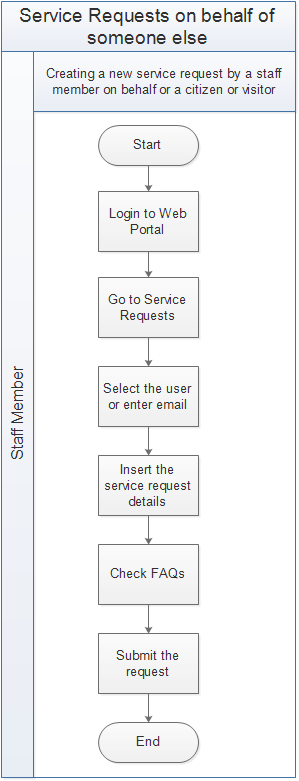
Procedures
This document explains the process of submitting a service request on behalf of a citizen or visitor.
How to Create a Service Request for Someone Else
To use any module within a TownSuite® web portal, users need to type the URL in the address bar of the web browser (The URL provided is specific to each municipality.) and log into the portal by entering credentials.
URL - yourtown.ws.townsuite.com
After successfully logging into the TownSuite® web portal, you will land on the main dashboard. To access the Service Requests section, click the Service Requests heading under the Components section of the main navigation pane. You will be navigated to the main service requests page which displays previously submitted service requests as a summary and links to service request related functionalities.
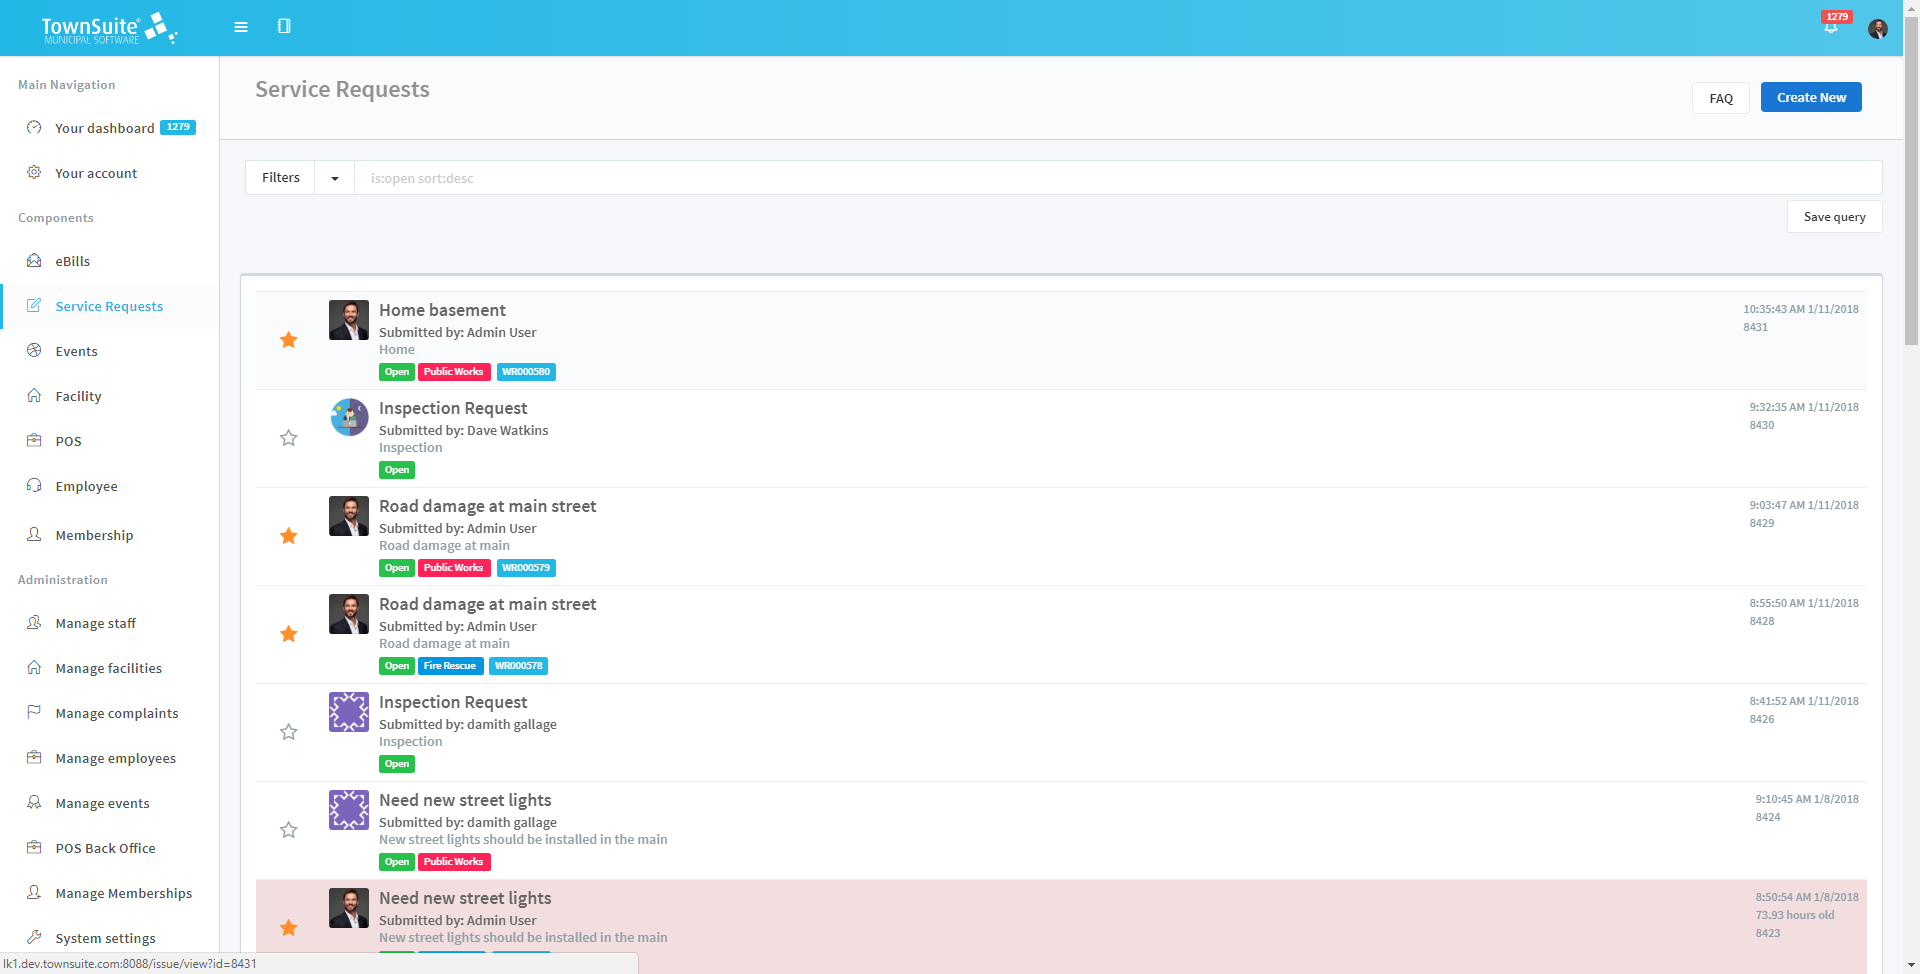
To log a service request, open the Create Service Requests form by clicking the Create New button. You will be navigated to the Create Service Requests page. Click the For someone else button to navigate to the Create Service Requests form.
Adding a New Service Request on Behalf of Someone Else
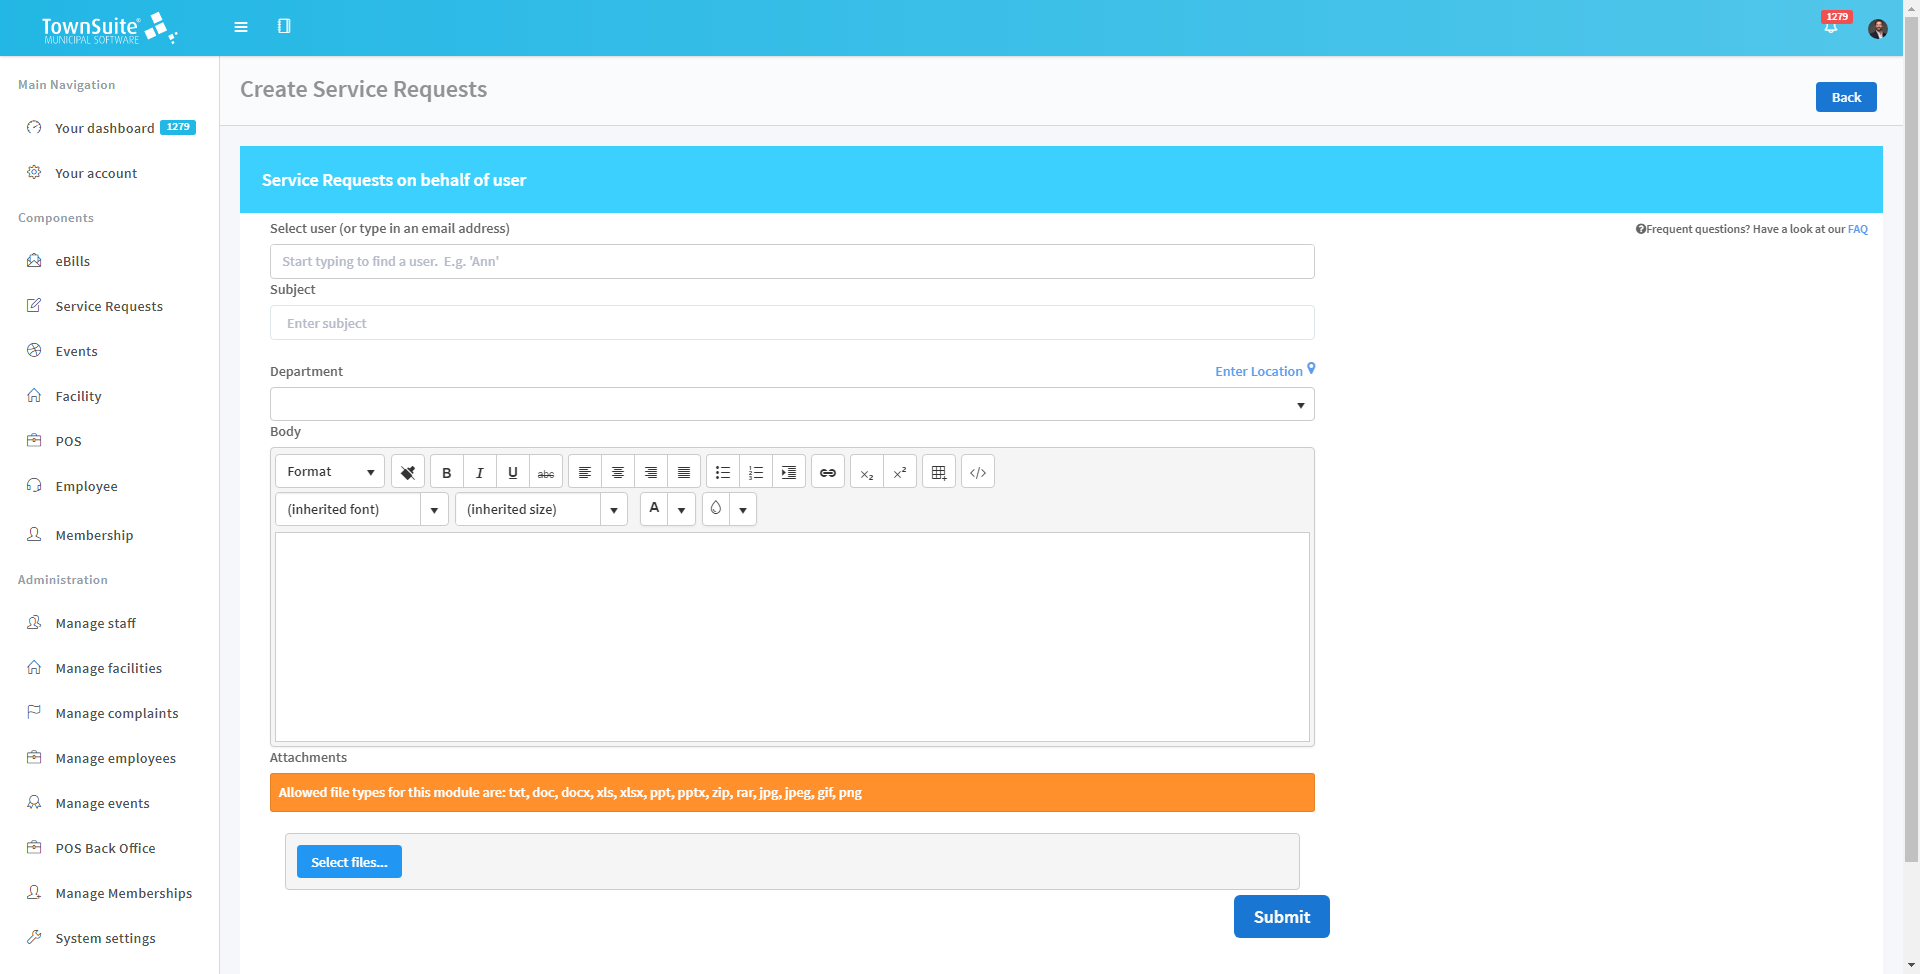
To log the service request on behalf of someone else:
-
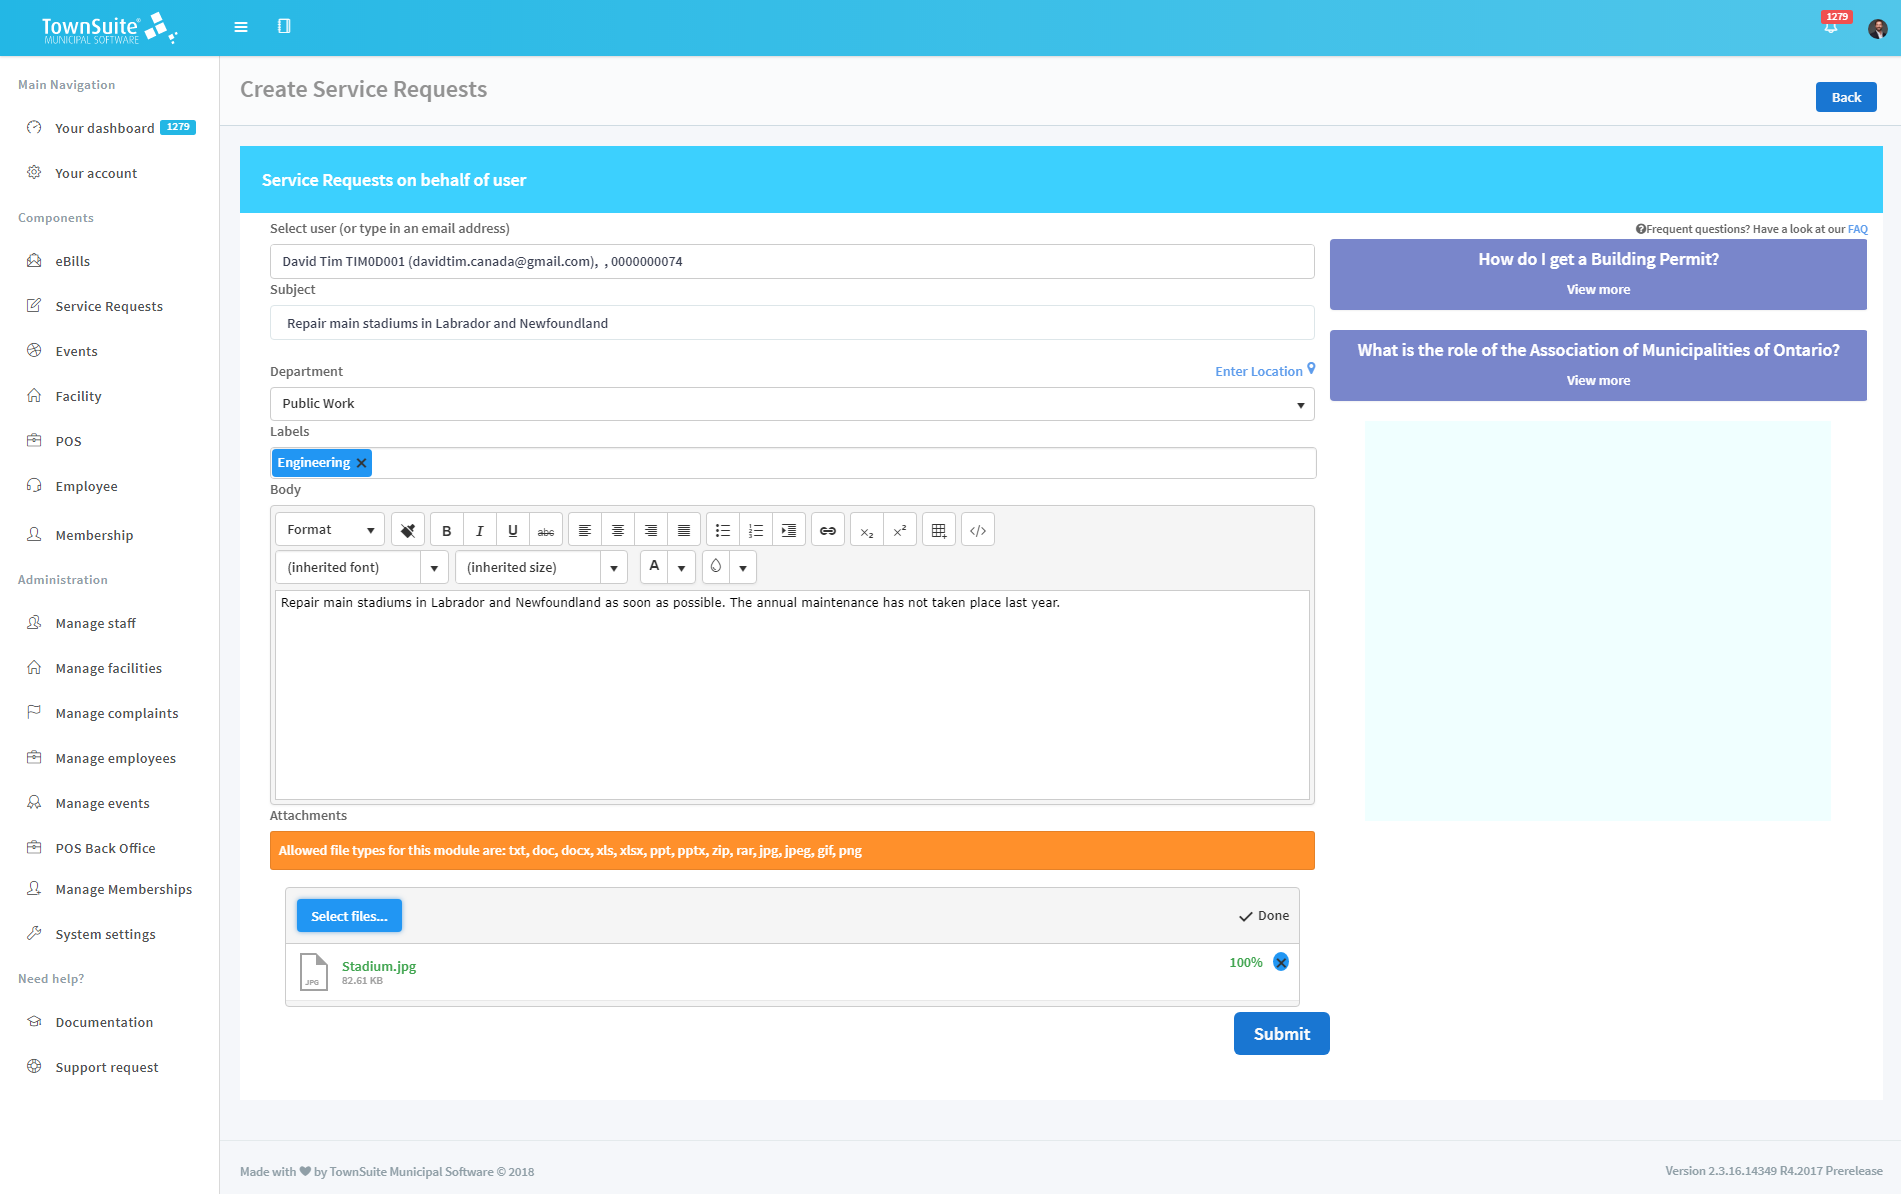
In the Select User text area, select the citizen or type the email address. When the first few letters of the name are typed, suggestions will pop up and you can select the person.
-
Enter the Subject which expresses the summary of the service request in the Subject text area.
-
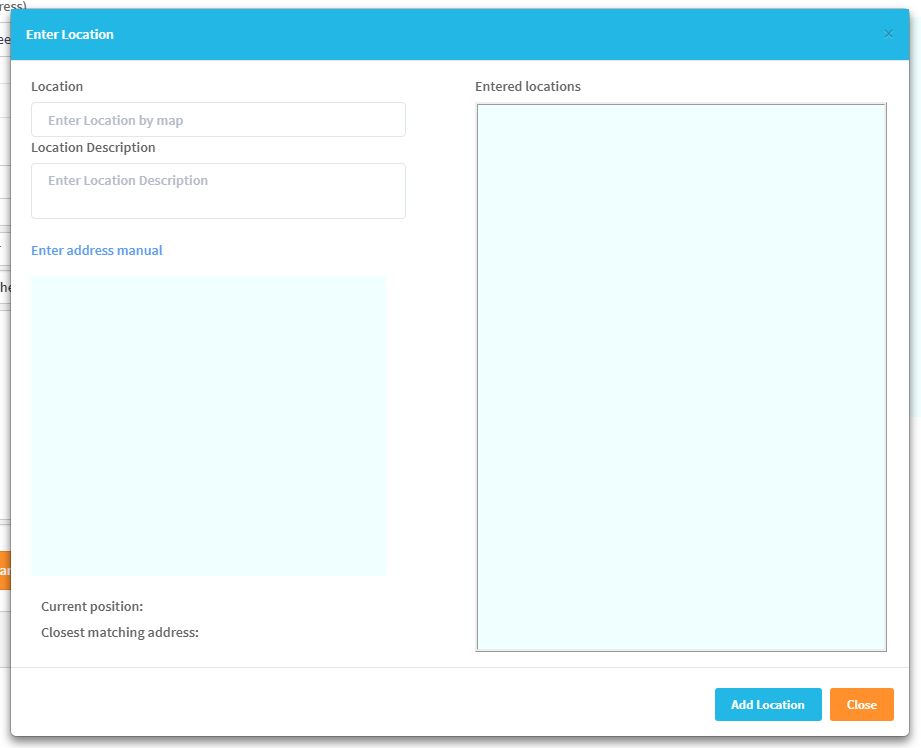
Next, select the location that is relevant to the service request by clicking the Enter Location link and the Enter Location form will be opened and displayed on the interface.
-
You can enter the location using the map and manually as well.
-
To enter the address manually, click the Enter address manual link.
-
To enter the address using the map, click the Enter by Map link.
-
Type the location and location description in the Location and Location Description text boxes.
-
If it is entered using the map, while typing, suggestions may populate and you can select the relevant option.
-
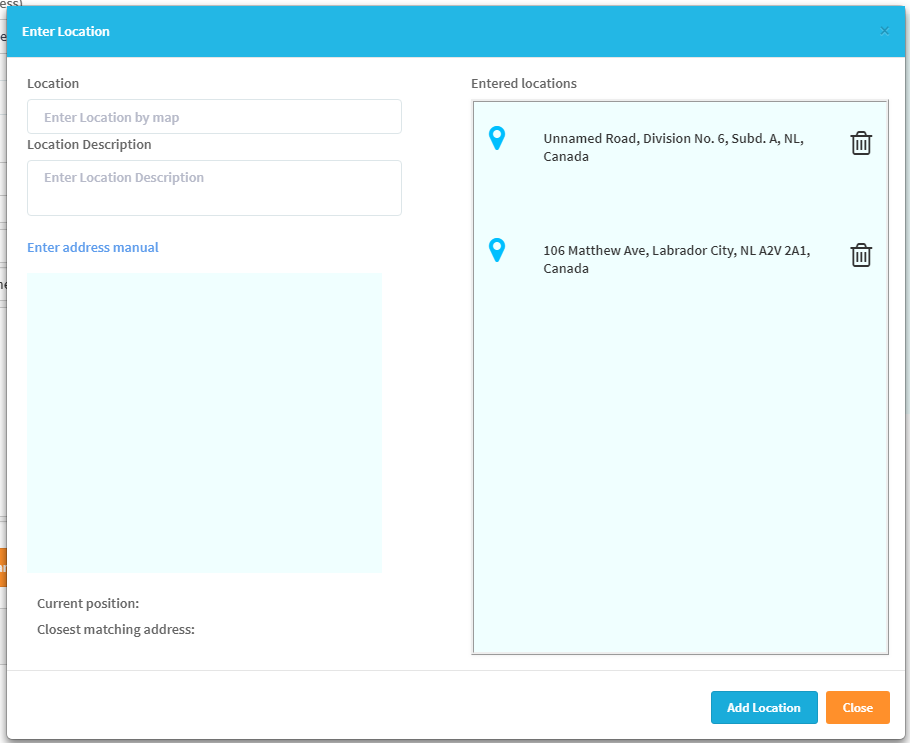
If the location is entered using the map, it will be visually indicated on the map in the Enter Location form.
-
Previously entered locations will be displayed in the Entered Locations section in the Enter Location form.
-
To add the locations to the list in the Entered Locations section, click the Add Location button.
-
You can enter multiple locations.
-
-
If you know which department will handle the complaint, you can select the department from the Department dropdown list.
-
You can select the label from the Labels dropdown list.
-
Frequently asked questions related to the selected department will be displayed on the right side of the interface.
-
Enter the description about the complaint in the Body text area. Text can be formatted as preferred.
-
Documents related to the service request can be added as attachments by clicking the Select files button.
-
All attachments will be displayed at the bottom of the form.
-
Remove attachments by clicking the Remove button (cross in front of the attachment name).
-
Once the service request has been added, click the Submit button to save it.
-
A success message will appear on the screen and routes to the interface where you can view the newly added service request details.
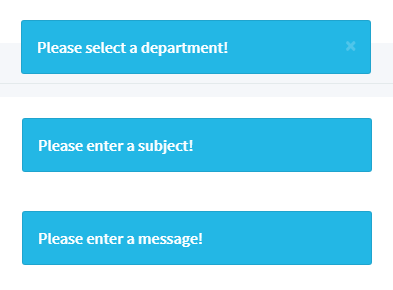
Validation Errors
If the form is submitted without entering one of the required fields such as subject, body (message) or department, an error message will be displayed.
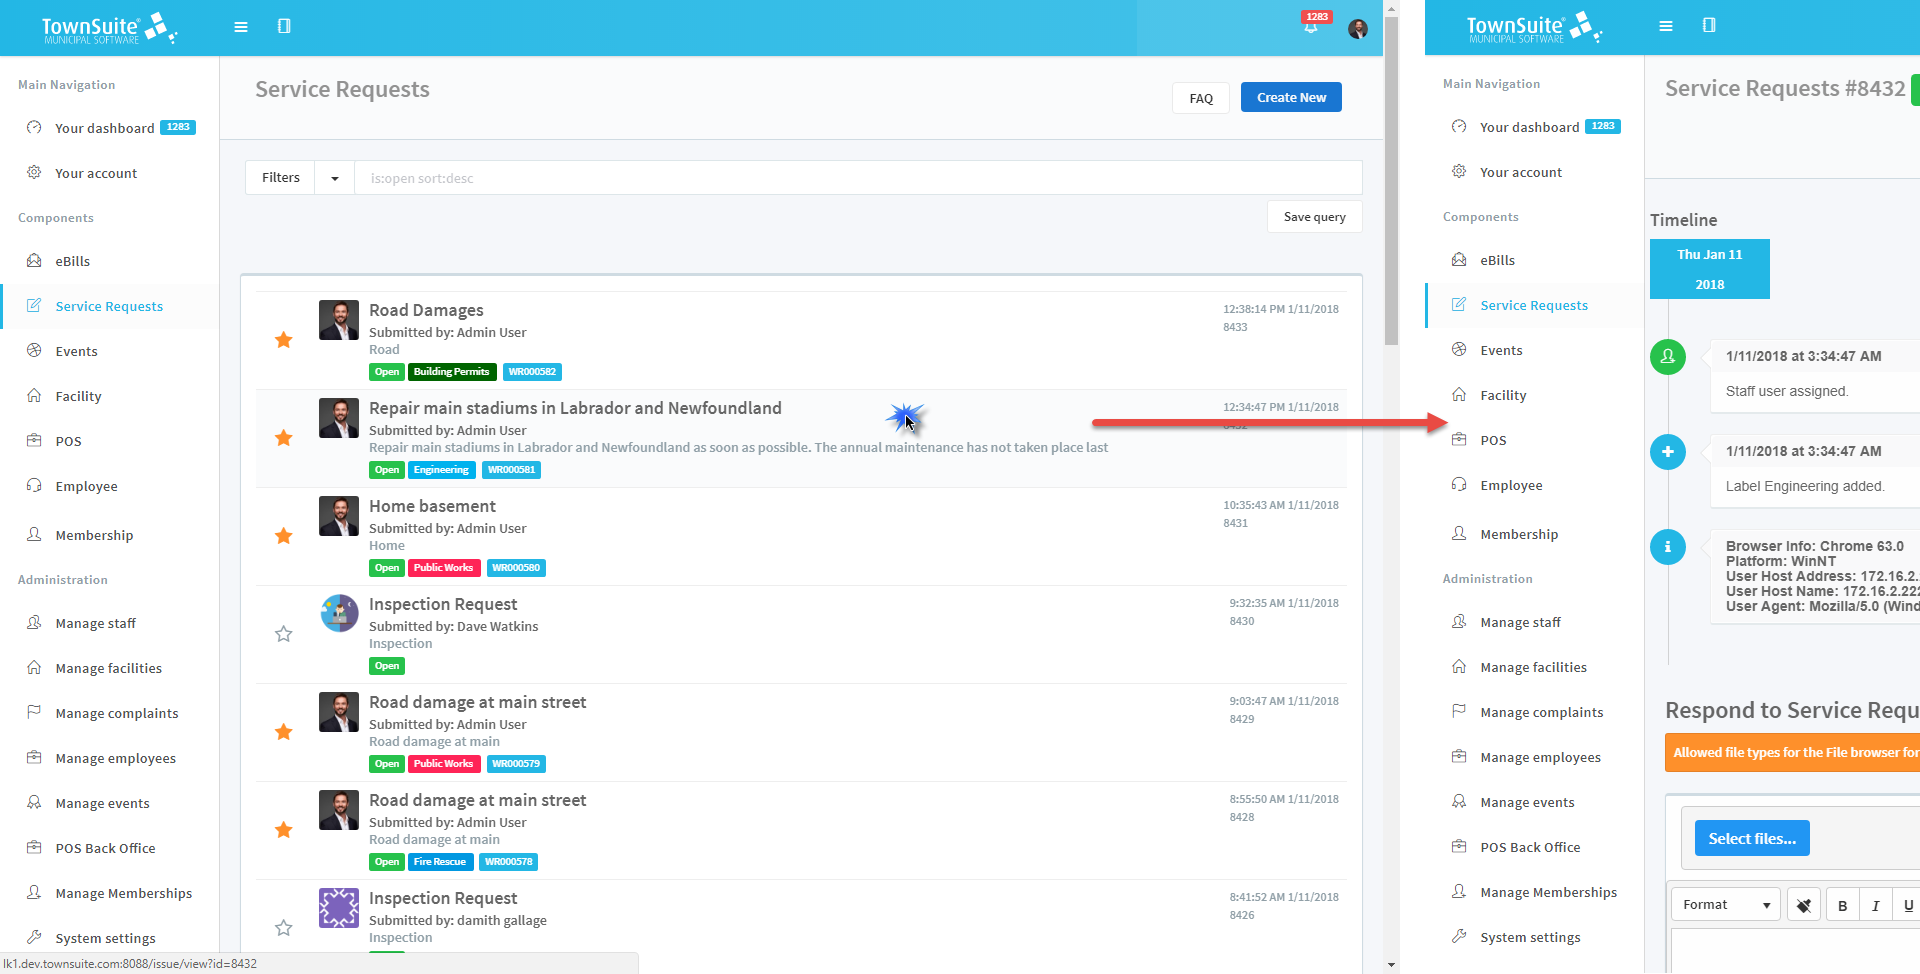
Detailed View of a Service Request
The main service requests page contains the list of service requests already added by the citizen. You can navigate to the service request by clicking the list item.
Users will be directly routed to the detailed view of the service request after submitting/creating the service request.
This allows the users to view the details and status of the service requests.
On the main service requests page, each list item displays a summary of the complaint.

- It displays the subject of the service request, the person who submitted the request, the status of the request, the department assigned, plus the date and time of the service request creation.
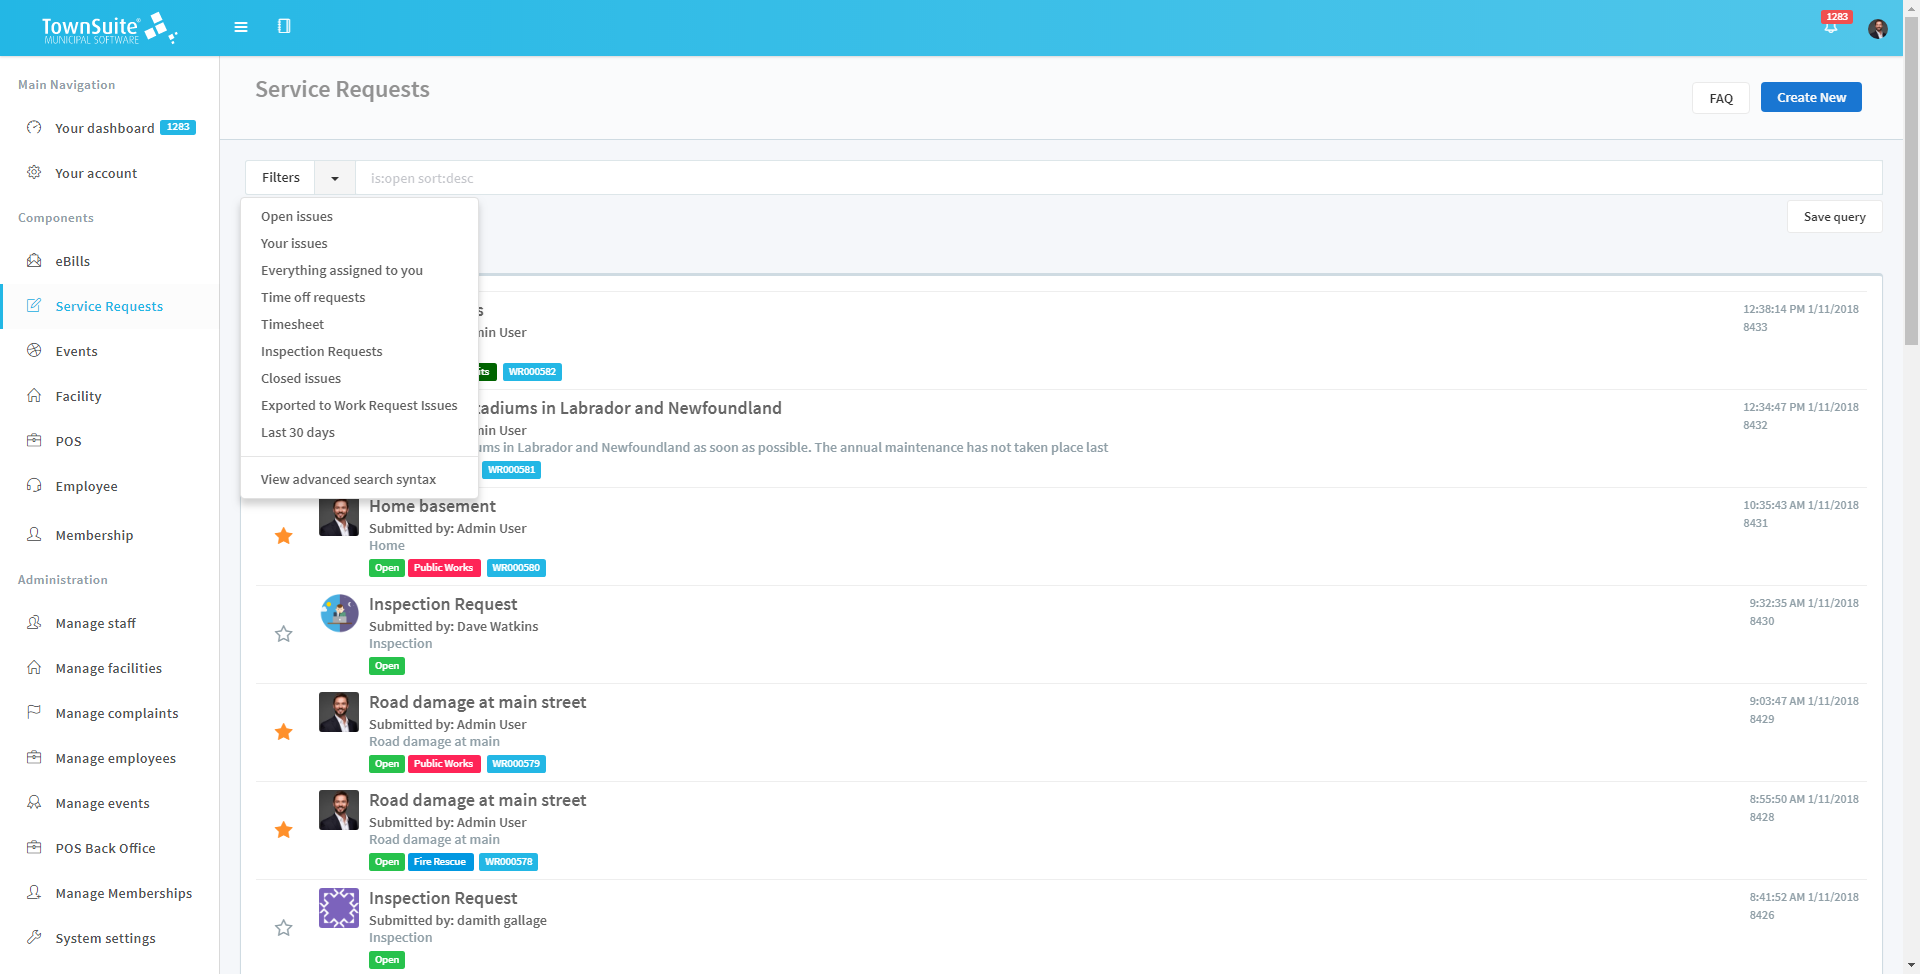
The main service requests page also provides filtering options.
-
Click the arrow next to the Filters label to select the preferred filtering option.
-
To view the advanced options, click the View advanced search syntax option.
-
To perform an advanced search, enter the advanced search syntax in the text field in front of the Filters label.
-
After entering the advanced search syntax, if you have clicked the Save Query button, by default these items will be loaded when you next open the main service requests page.
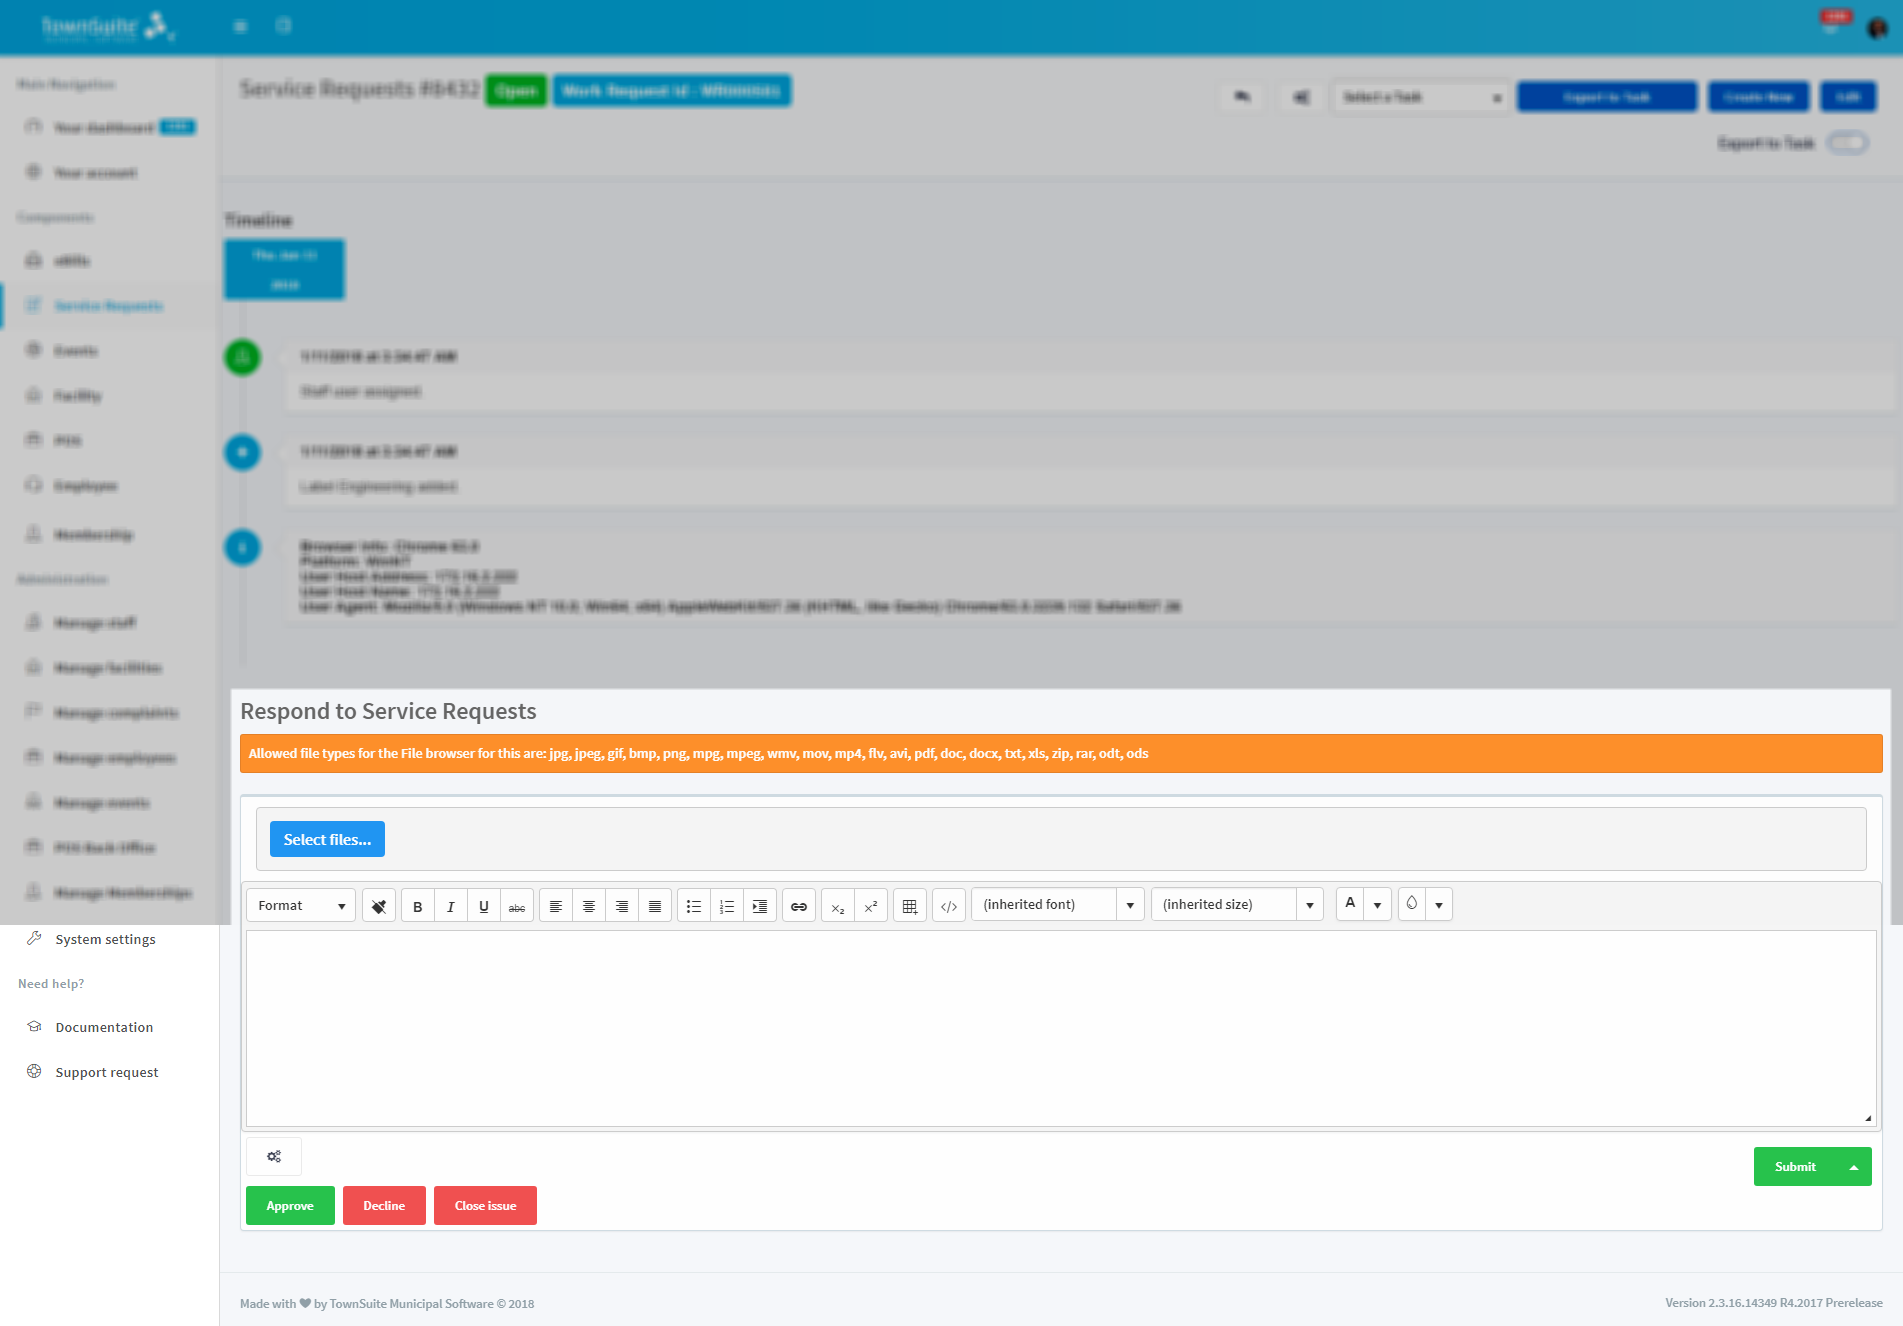
Detailed View
When you click on the list item in the main service requests page, the detailed view page of the service request will be loaded.
-
The page displays the service request, the details entered when creating the request, and the date/time information.
-
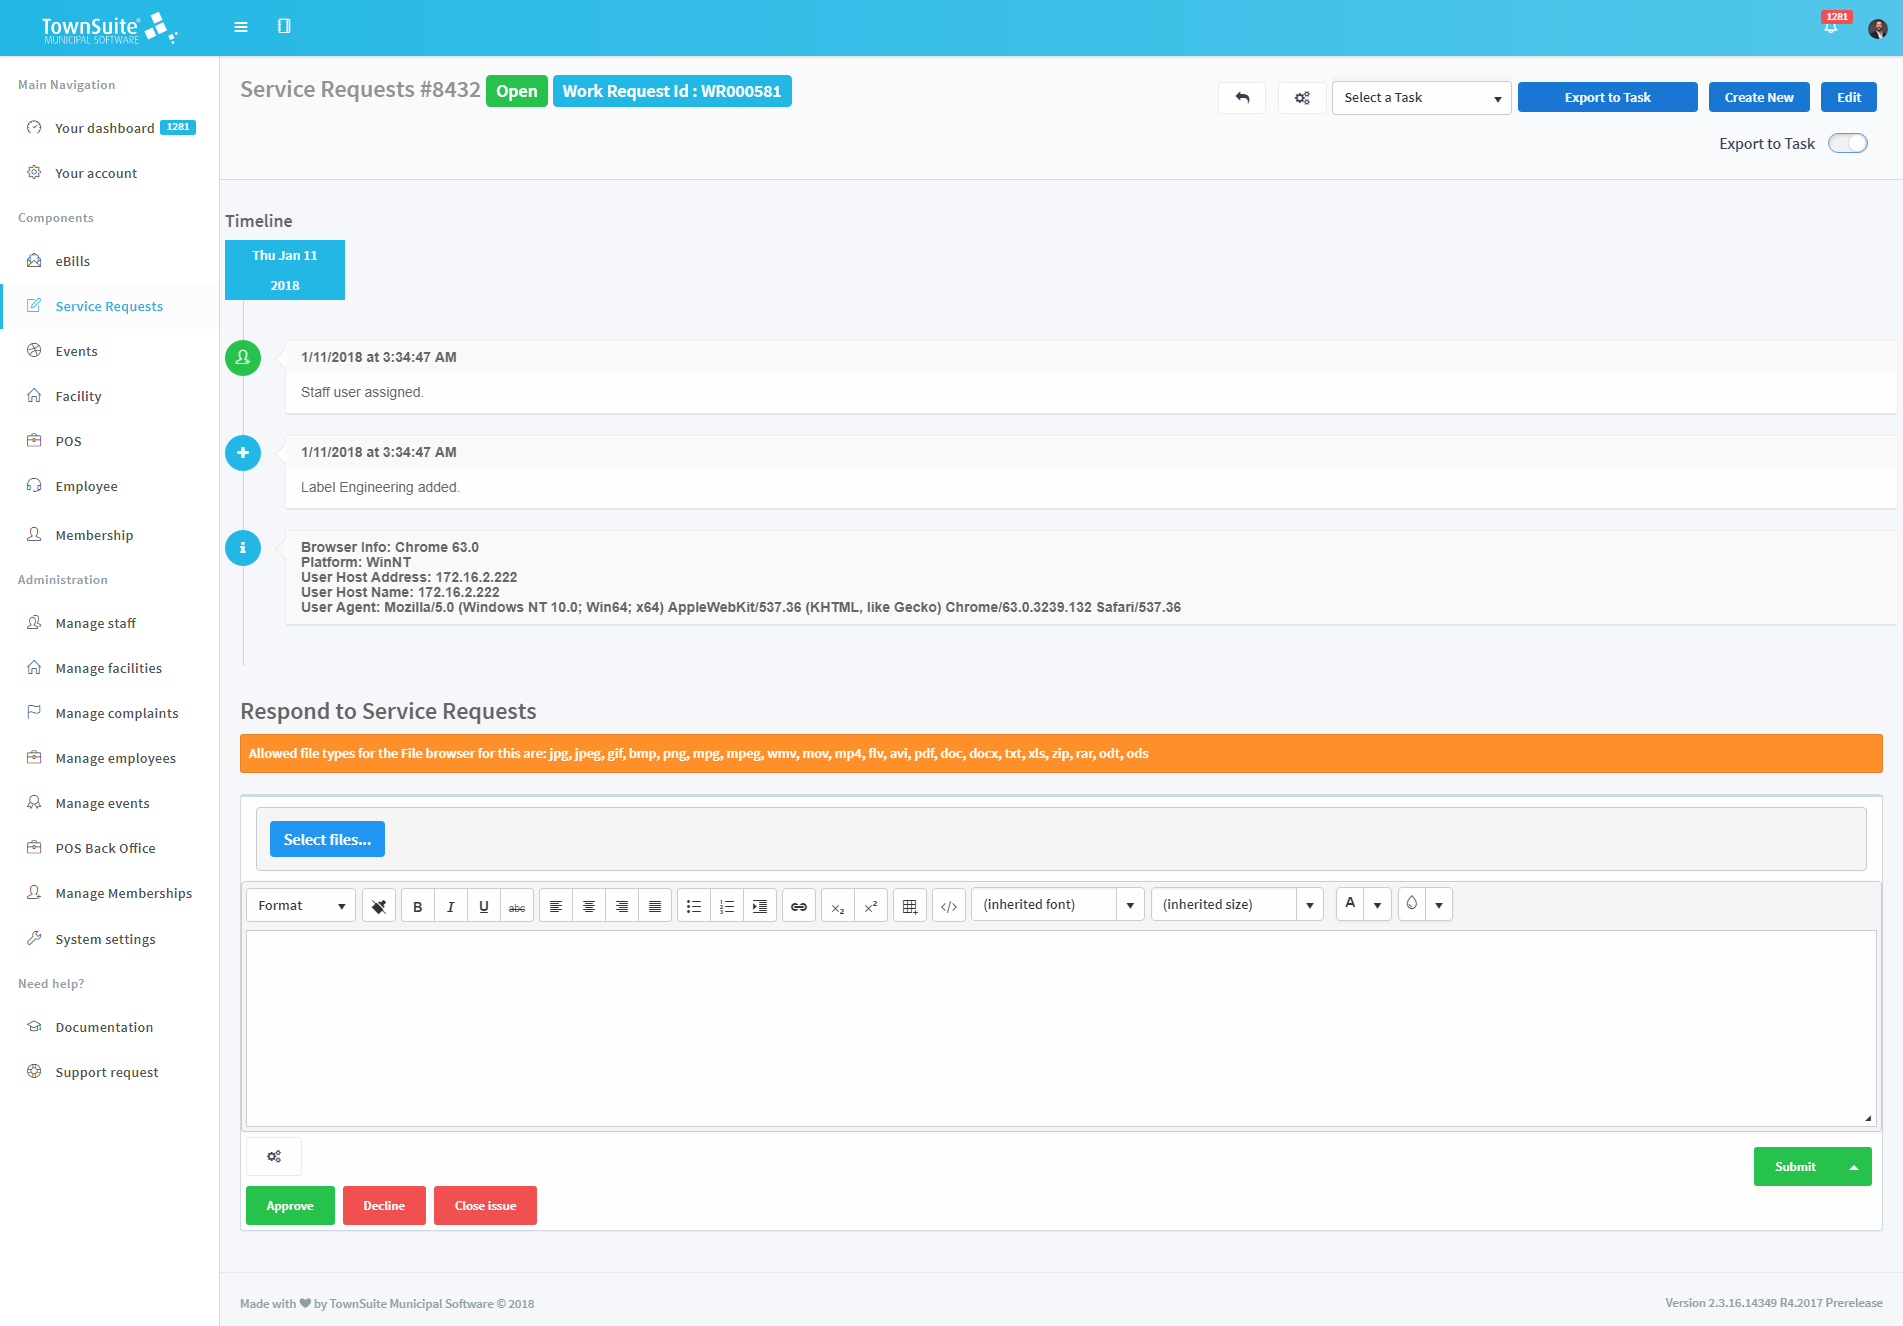
The service request number is displayed at the top of the page along with the status: Open, Pending, or Closed. If Open, it is highlighted in green. If Pending, it is highlighted in blue. If Closed, it is highlighted in red.
-
The page also displays the labels (department) assigned to the service request.
-
The page includes a timeline which displays any updates to the service request.
-
Both the citizens and municipal staff can respond to service requests.
-
After entering the concern in the text area with the attachments, under the Respond to Service Requests heading, click the Submit button. You can submit it as open, pending, internal message, or solved by selecting the option after clicking the arrow button next to the Submit button.

-
The submitted response will be displayed in the timeline.
-
You can edit the response by clicking the Edit icon in the top right hand corner.
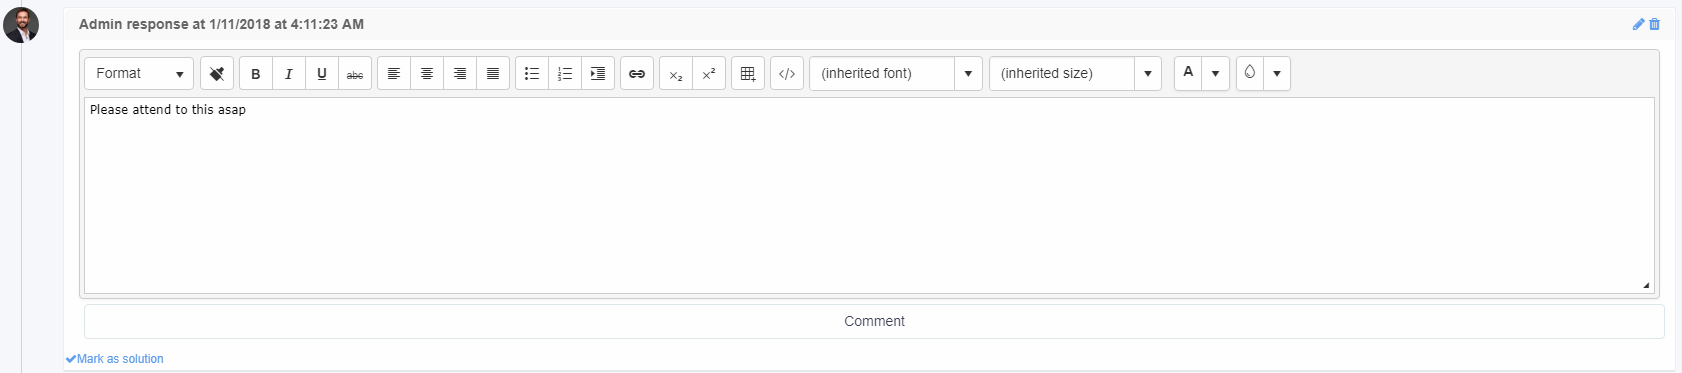
-
You can delete the response by clicking the Delete icon in the top right hand corner.
-
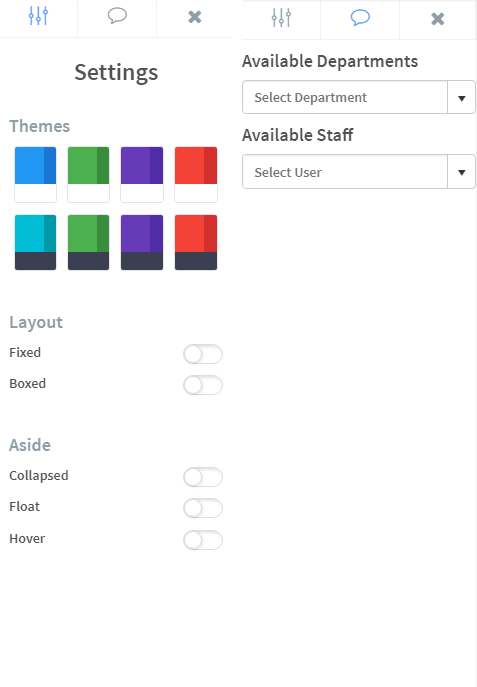
To assign a department, label, staff member, select a theme, or layout, click the Settings button next to the Close issue button. The settings window will appear in the right hand corner.
-
To close the service request, click the Close issue button.
-
To create a new service request, click the Create New button.

-
To go back to main service requests page, click the Undo button.